
We wanted a quality selection of blinds throughout the whole home to match our build upgrades and furniture options. We knew this was going to be an expensive project however we had been setting aside some funds just for this.
We looked a couple of different blind companies however settled with Into Blinds in Thomastown. Our rep was Matthew who was great initially however was hard to get in contact with once they had taken our deposit. It took a couple of meetings and a few phone calls to lock in the items we wanted.
We are still yet to do a formal measure and sizing appointment which will take place on site. We are also yet to formally choose colours however we know what we want in the way of looks. We will probably be going with charcoal/grey colour combinations throughout.
Our quoted price for the below blinds is $9,687.
The below is what we have chosen.
Note:
"Fit In" means the blind will sit inside the window frame (you will see gaps of light down the sides of the blind).
"Fit out" means the blind will sit on top of the architrave/window frame (no gaps for light).
Main Bedroom
"Fit Out" block out blind with Floor to Ceiling/Wall to Wall screen curtain. Includes fabric wrapped pelmet.
 |
| Wall to Wall / Ceiling to Floor. Screen curtain with block out blind underneath |
Bathrooms/Laundry/Powder Room
"Fit Out" block out blind. Includes fabric wrapped pelmet.
No need for screen blinds in these rooms.
 |
| Plain block out blind in "Fit Out" with pelmet |
Office
"Fit In" screen blind with "Fit Out" block out blind. Includes fabric wrapped pelmet.
 |
| Double blind (1 screen and 1 blockout) with pelmet |
Alfresco Doors
"Fit In" block out blind. Includes fabric wrapped pelmet. 4 blinds in total (2 each door).
As the doors for the alfresco is so big we can't cover this area in only 1 blind each side. This means we will have a gap between each blind. As there is a gap that can't be helped we have chosen the block out blind just for basic privacy. This blind will never be light tight however we chose the "Fit In" placement in case we choose to add a wall to wall / floor to ceiling curtain at a later date.
 |
| Alfresco door blinds (Note gaps between blinds) |
Living
"Fit In" screen blind with "Fit Out" block out blind. Includes fabric wrapped pelmet.
 |
| Double blind (1 screen and 1 blockout) with pelmet |
Bedrooms
"Fit In" screen blind with "Fit Out" block out blind. Includes fabric wrapped pelmet.
 |
| Double blind (1 screen and 1 blockout) with pelmet |
Theater
"Fit Out" block out blind with Floor to Ceiling/Wall to Wall screen curtain. Includes fabric wrapped pelmet.
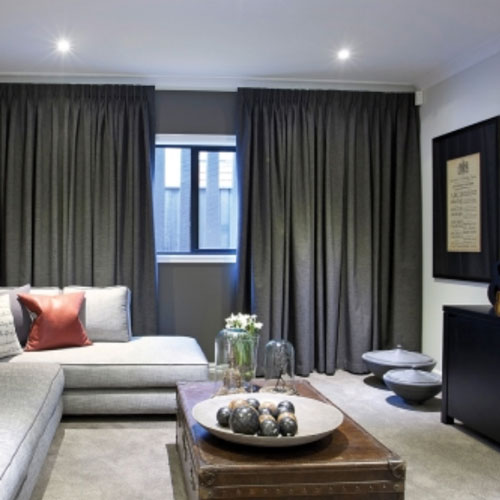 |
| Wall to Wall / Ceiling to Floor. Screen curtain with block out blind underneath |


